Since the monthly release of the "Day By Day" series was completed, These days I am in the process of preparing for a new project.
We will be taking a break from releasing new stamps for a while, In order to let you enjoy Sakuralala stamps even more, we have released I would like to focus on each stamp and introduce some ideas and tips on how to use them.

For the first installment, we'd like to shine the spotlight on the very first stamp we created, 365: Daily .
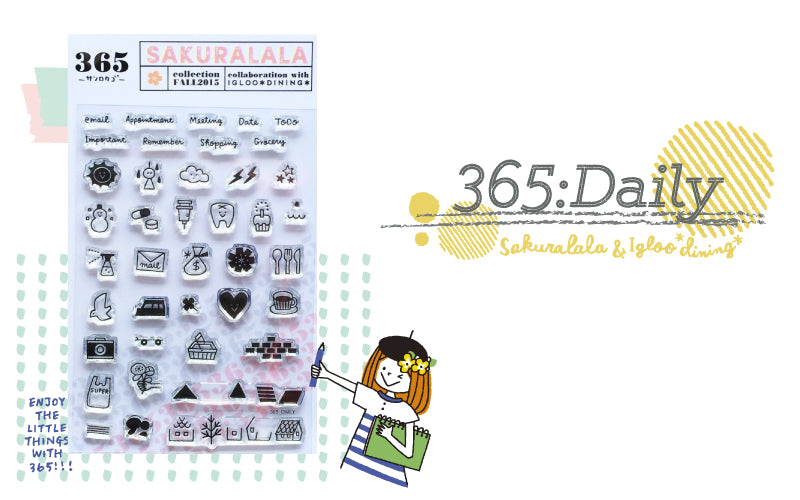
This stamp set can be used in a variety of situations, not just in notebooks, diaries, and memory keeping, and has remained popular since its release.
Let's start with English words.
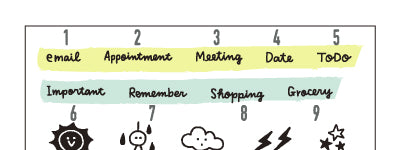 1. Email
2. Reservations
3. Meetings
4. Date | Date
5. To DO
6. Important
7. Things to remember
8. Shopping
9. Groceries
*Can also be used in combination with Grocery Shopping to go grocery shopping.
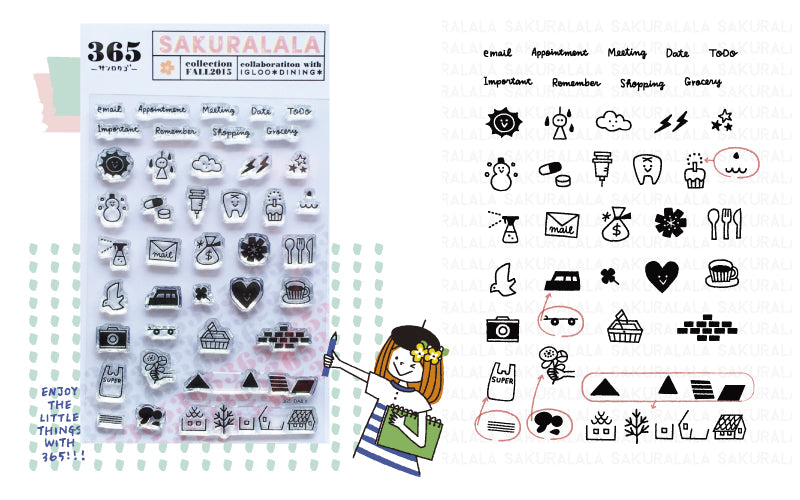
This image is of the actual stamp. There are some areas where the ink has rubbed off, which I think conveys the atmosphere even more.
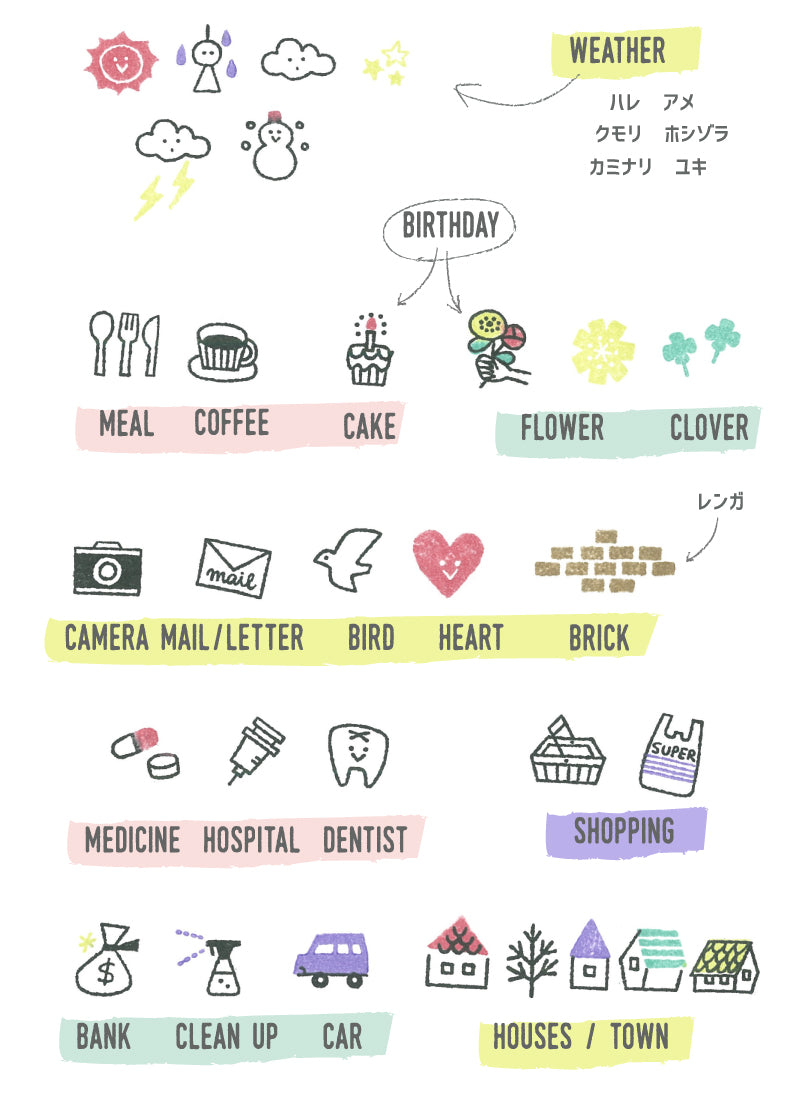
This set contains a total of 26 different designs.
However, when you actually look at the stamps, you might find yourself scratching your head and thinking, "Huh? There are 31 stamps with different designs, but only 26 different types in total?" or "I wonder what design this stamp has?!"
The "what is this picture?" is part of a stamp set that has the option to be layered or combined. Some stamps do not have a picture on their own, so there are a total of 26 stamps.
Next, I would like to introduce some techniques for layering and combining prints, as well as some tips on how to apply ink.
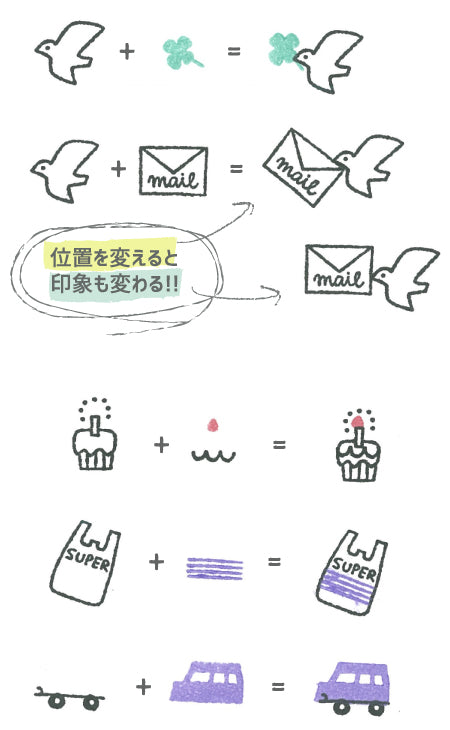
Bird <br>Print so that it overlaps the beak, as if the bird is holding a clover or a letter. Just changing the angle can change the impression.
Cake <br>Changing the ink on the candle part looks nice!
Supermarket bags <br>You can use them as they are, but adding a border makes them even cuter.
Cars <br>It looks cute when stamped in various colors!

The question we get asked most often is, "What is this stamp?" It's a brick stamp.

① Make it look like a dog or cat is peeking through the wall...
② Draw a door, stamp ivy, and express the exterior wall. ...
3) Use the cut masking tape as a roof to make a brick house ...
You can create a nice atmosphere by applying ink in a deliberately rubbing manner, or stamping the bricks in a rough way so that the bricks are connected.
(Stamps used: Dog | Cat | Ivy )
And finally, there is the row of houses that can be combined with the "What design is that?!" stamp to complete the design, and the flower stamp that you can enjoy coloring . Both can be made many times cuter by changing the way you apply the ink.
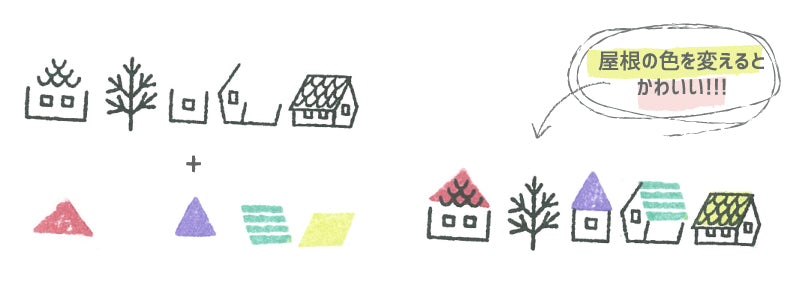
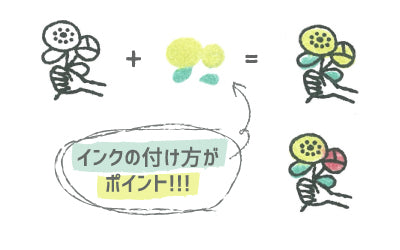
In fact, these stamps of houses and flowers were not stamped one color at a time, but rather stamped all at once.
I think you can put ink on any ink pad once you get the hang of it, but I recommend the "Broad Bean" ink. It's small, so it's easy to control where you put the ink, and it's easy to carry around, so it's very convenient!
On the other hand, it may not be suitable for applying ink to large surfaces, but the colors are well matched, and I have been using it for many years. (Recently, I have been using only "Iromoyo" ink for stamps with large print surfaces.)
I took some pictures to show you how to apply the ink. First, start with the house-like stamp.
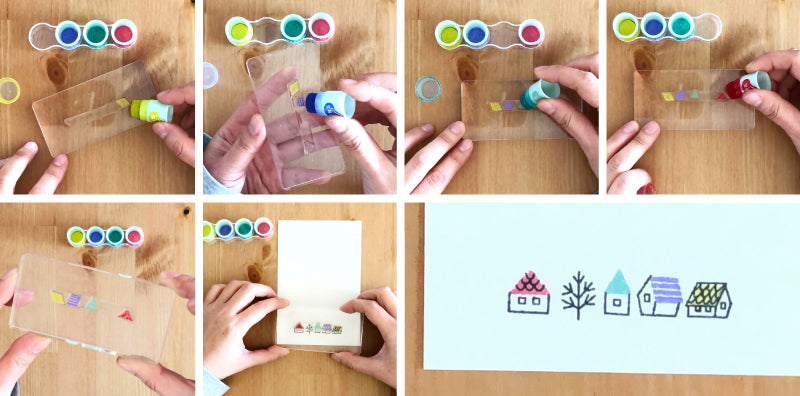
It would be cute if all four houses had the same color roof, but I tried using different color inks for each one. This is easy to do because of the maneuverability of the "broad bean" ink.
I stamp the base of the house first, then the roof, but you can stamp in whatever order is easiest for you . The trick is to hold the acrylic block firmly with both hands, determine the position of the roof on both ends, and stamp boldly. Even if it's a little off, it's still cute, so it's okay!
Next is the flower stamp.
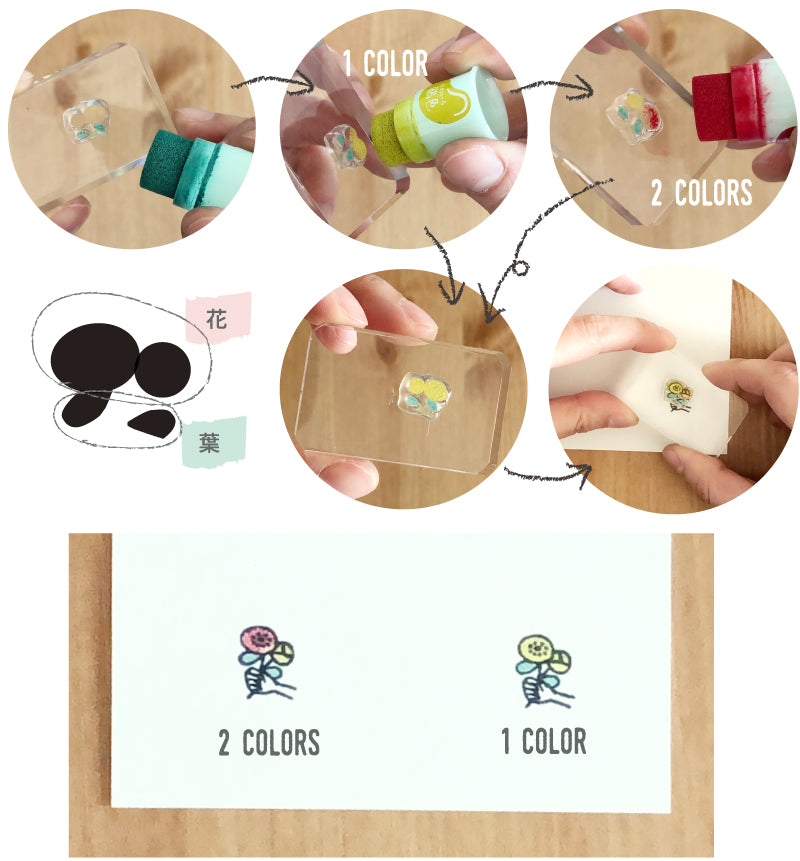
The trick to applying ink to the flower stamps is to hold the acrylic block at an angle and apply the ink little by little.
Whether you use one color or two colors of flowers, the difficulty remains the same. You will naturally get the hang of it after stamping many times, but at first, even with a small stamp like this, I think you will get a nicer impression if you hold the acrylic block firmly with both hands and determine the position before stamping.
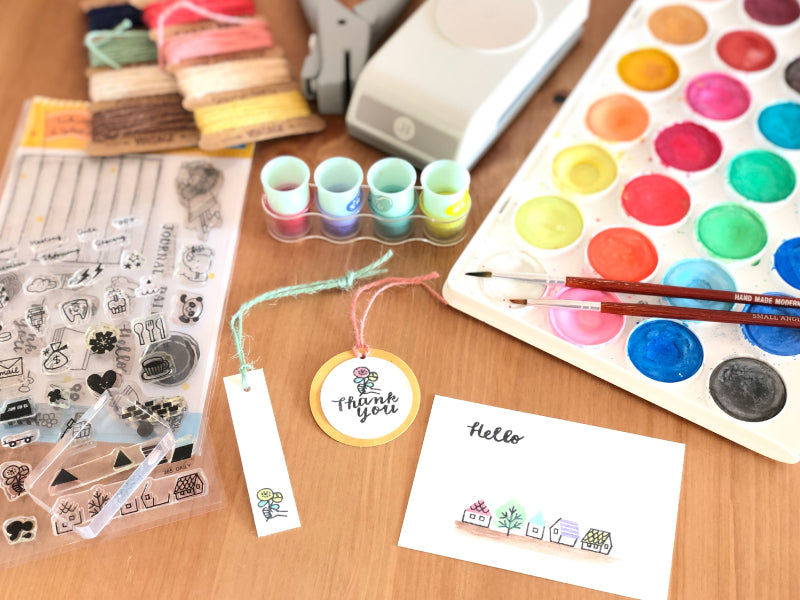
You can easily make simple but cute things like tags and mini cards. The best thing about clear stamps is that you can easily enjoy combining and layering them! Please give it a try!
As for the next blog, I will be taking a two-week break and will post it on Friday, October 6th.
As for the stamps that are out of stock, they will arrive from the factory soon. We will inform you in the newsletter as soon as the date of restocking is decided. We apologize for keeping you waiting for so long.
Thank you very much!

